
Making A Tool to Flatten Rings For Mail Armor
How to flatten rings for riveted chainmail with DIY tools.
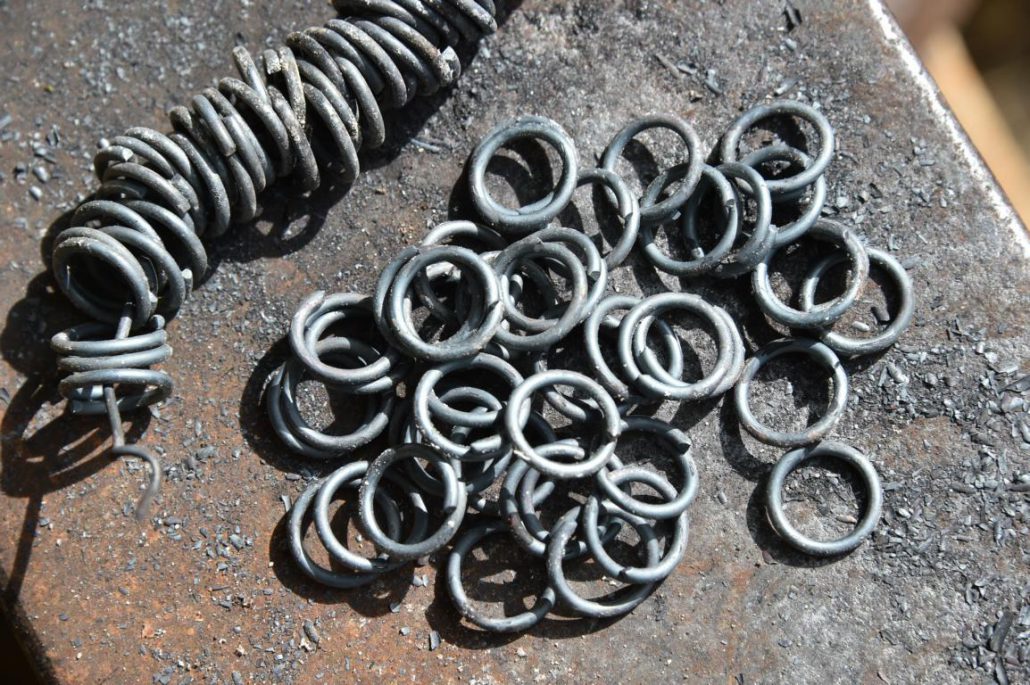
Despite all instructions making riveted rings can be understood best by trial. As a beginner you might produce most of your waste during flattening. To avoid this, you should have a look at the quality of the cut off rings. The overlapping ring ends should be exactly above each other and touch each other without a gap in-between. The inner strain in the material should be removed by adequate annealing. That’s the most important point.
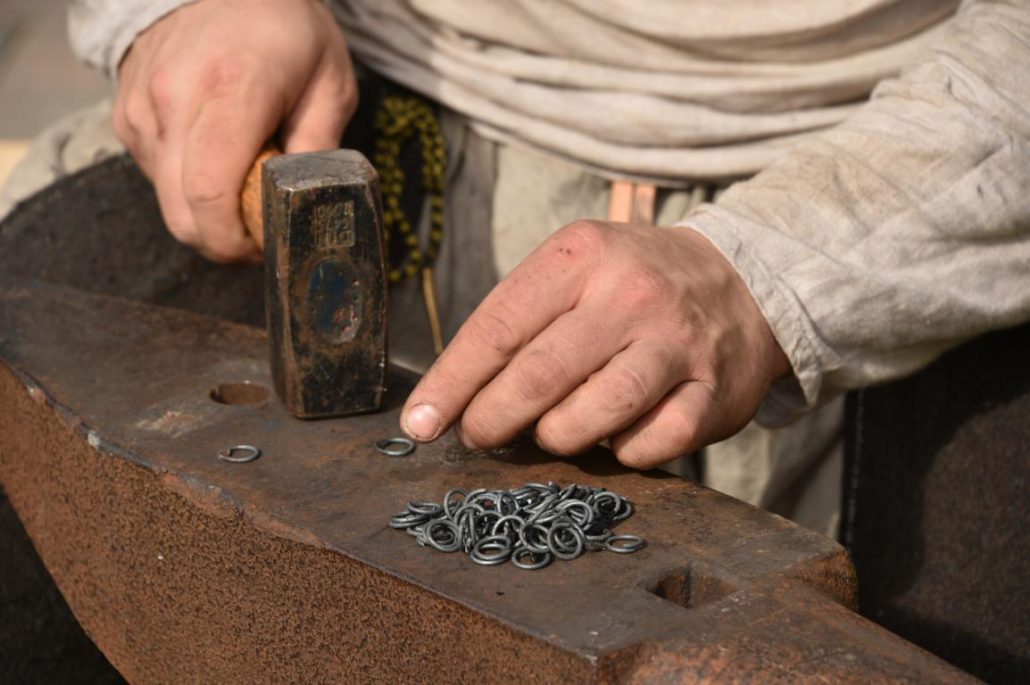
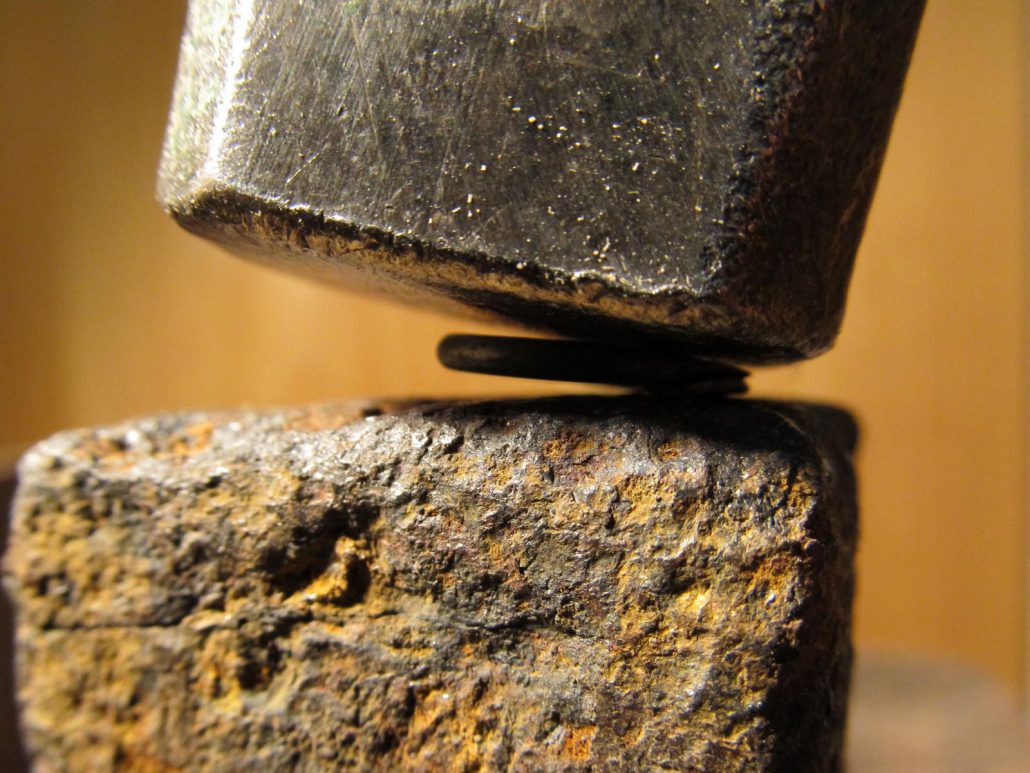
I use an ordinary hammer and a small anvil, which was once used for thinning scythes. It is plucked into a trunk and a piece of raw-hide is attached to collect the rings. The purpose of flattening is to create enough space for the rivet in the overlapping area. Thus it suffices, just to flatten the overlap. The other part of the ring can remain in a round cross-section. To do this, I strike the overlap in an angle of about 30° with the edge of the hammer. One or two strikes are enough.
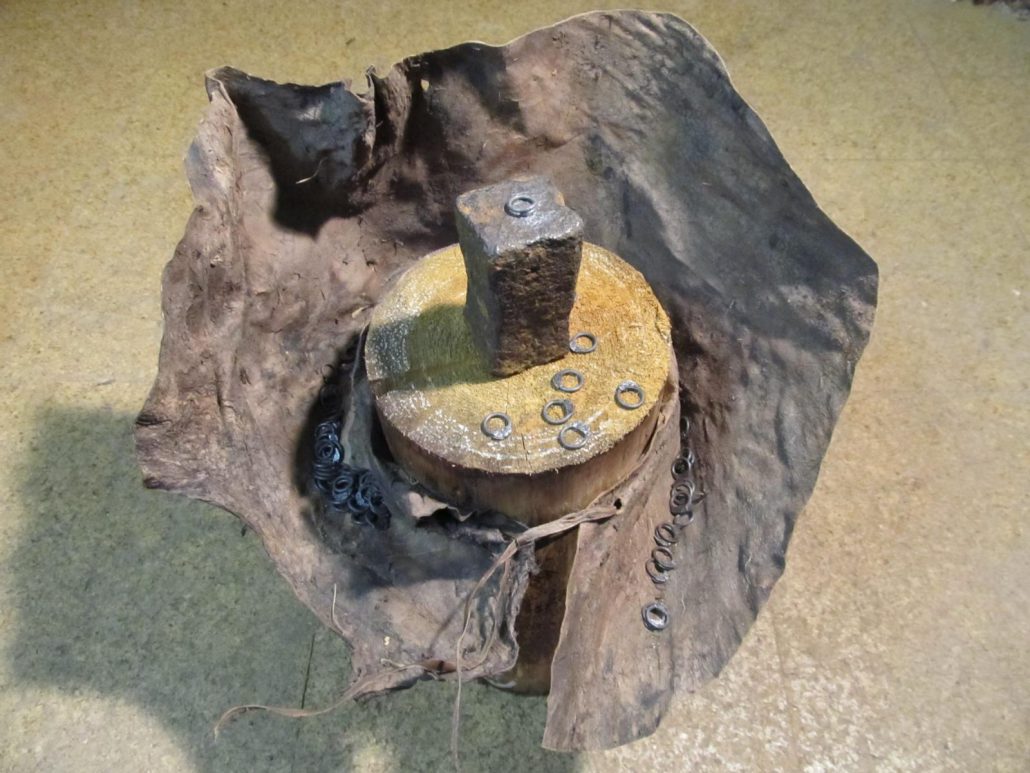
An anvil is also a good choice. It brings the advantage to push rings along its surface instead of picking them up each time:
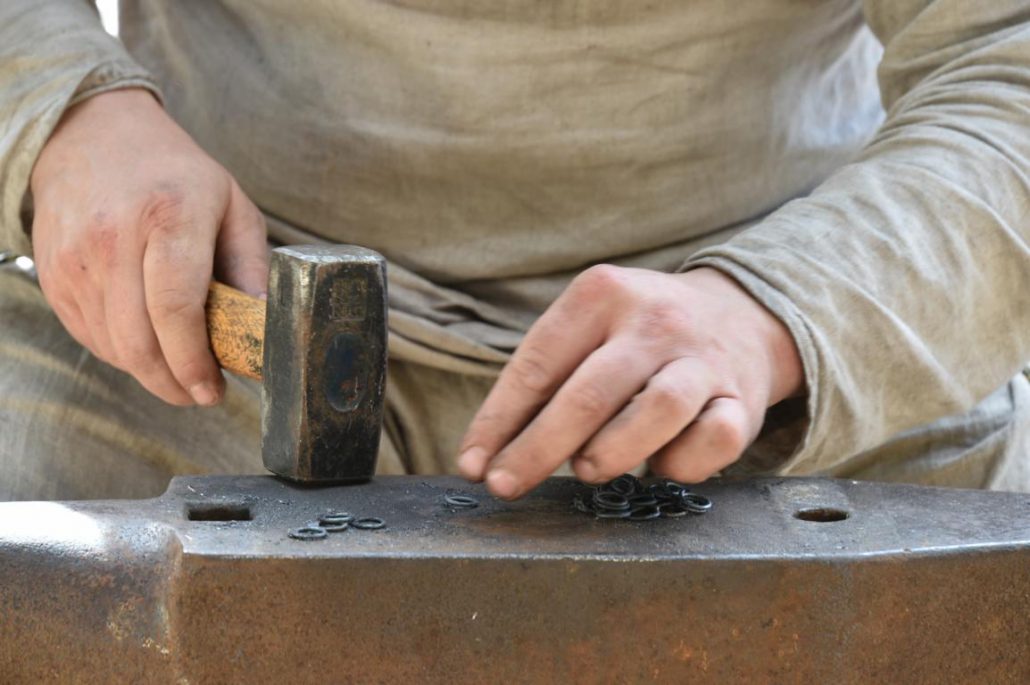
Some mail-makers like to flatten the whole ring. For it they use supporting tools like a cylinder in a hollowed cylinder, to do exact vertical strikes, but with some practise a comparable result can be achieved manually in less time, no matter if flattening the overlap or the whole ring. Supporting tools can be used to coin signs into the rings.
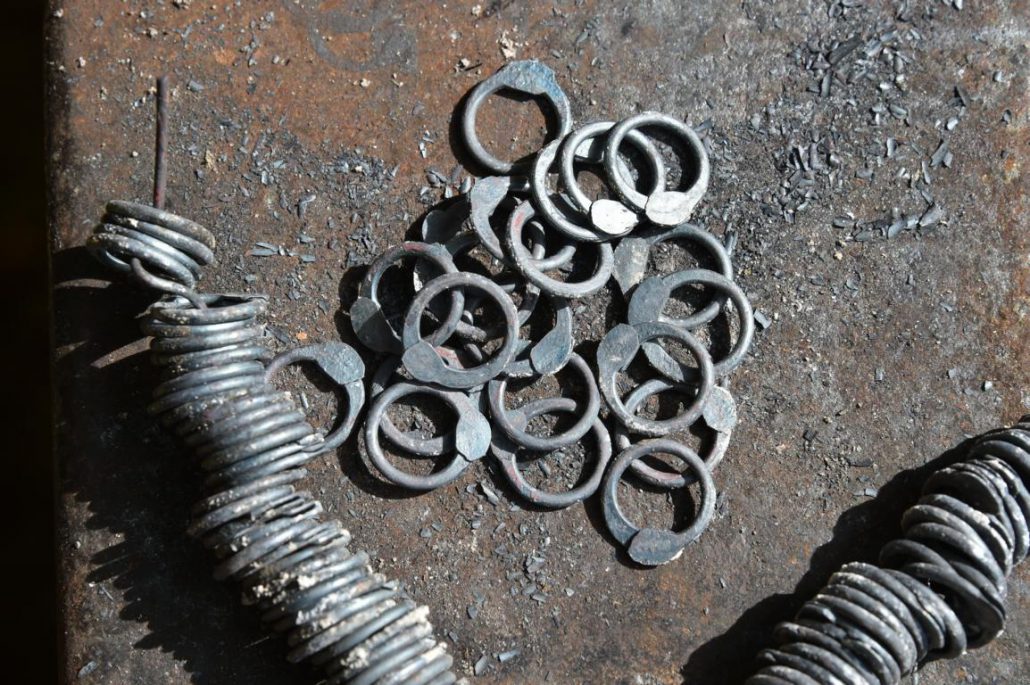
Flattening the whole ring reduces the inner diameter of the ring. Additionally rings with a rectangular cross-section just touch each other at the edges, whereas rings with a round crosssection touch each other closer to the middles of the crosssections. Thus flat rings show a smaller effective inner diameter and their ring weave needs more rings per area. This is why I prefer just to strike the overlap, which leads to what I call round rings. They are done well when they comply with the following characteristics:
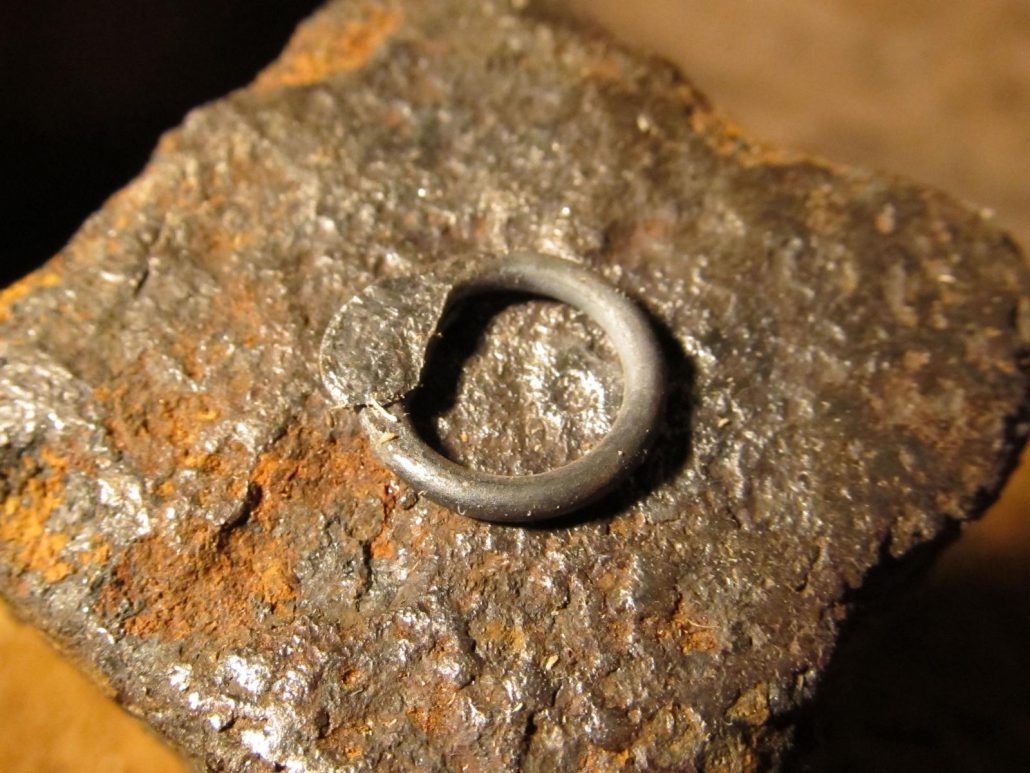
- The overlap should only be as flat as necessary, which means you are able to rivet without ripping the metal and the rivet-connection being as strong as the ring. If you drill or punch the rivet-hole afterwards, you need a thinner overlap than by piercing it, because you will remove material.
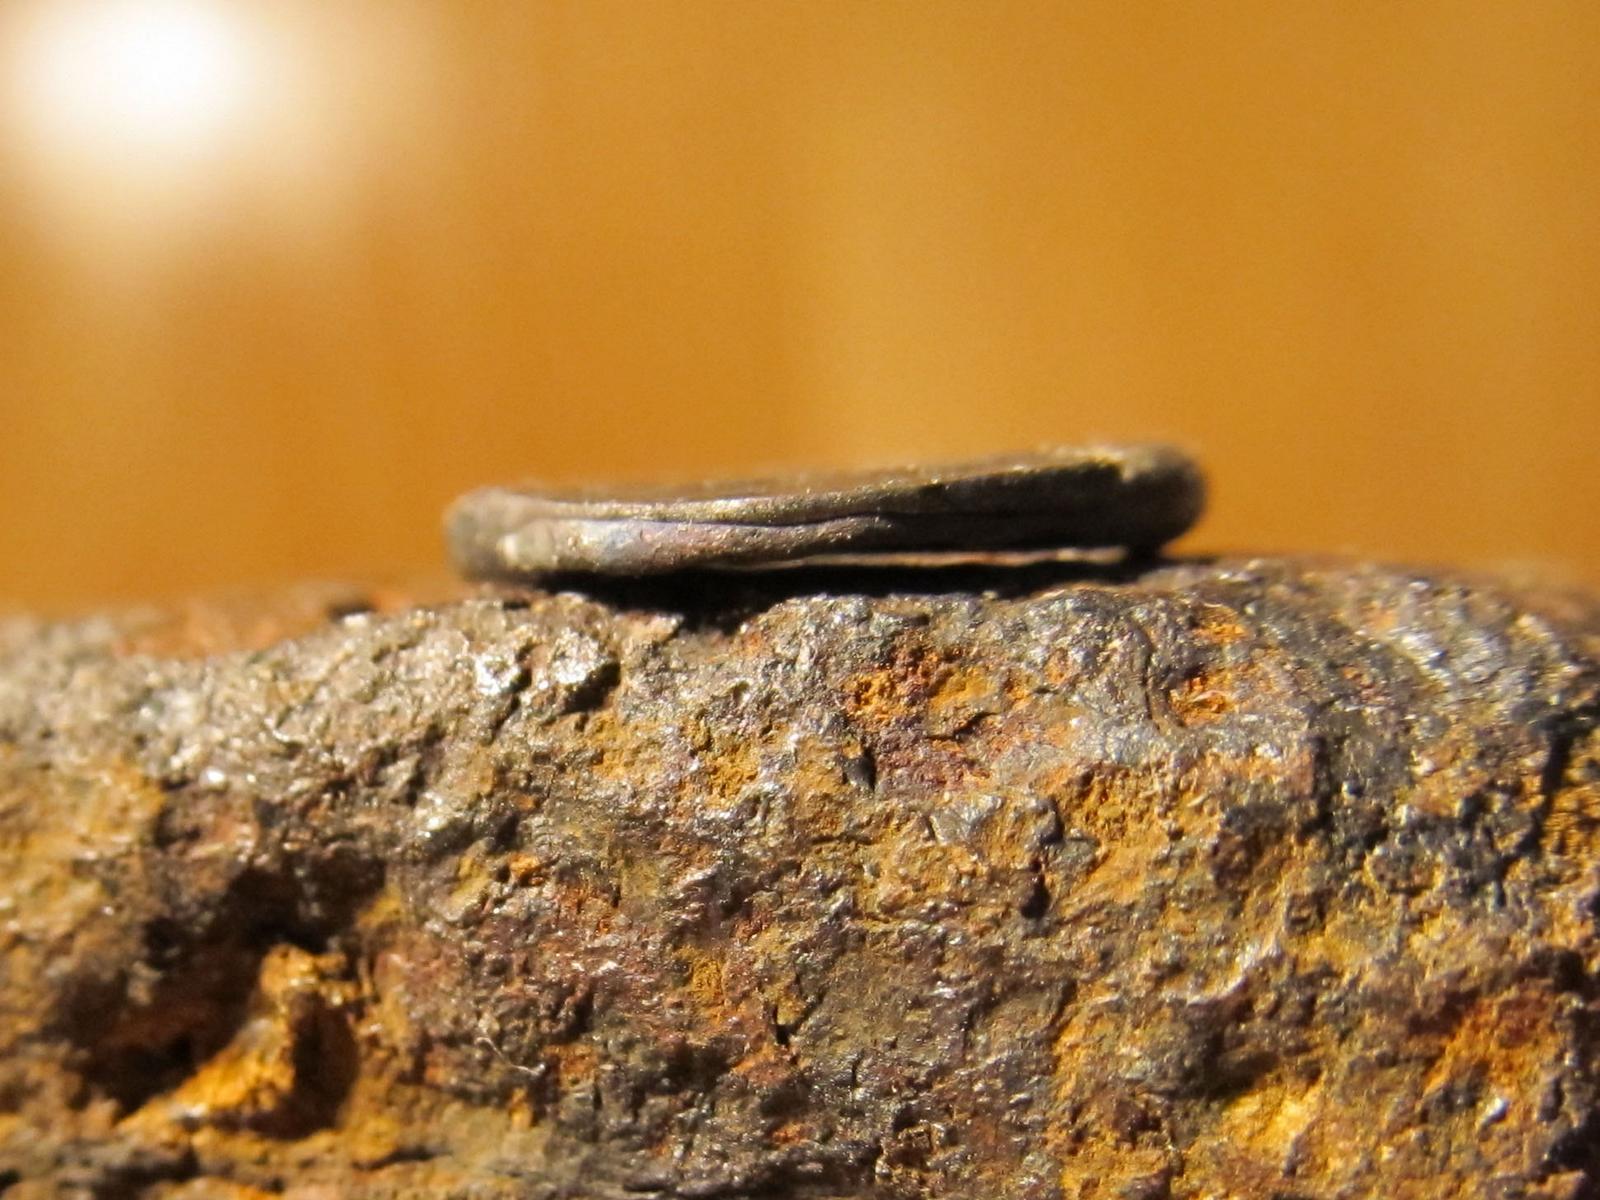
The ring ends sould not skip off each one another, which happens most likely if the rings are not annealed adequately. Neighter should they cross each other because their sharp edges are protruding and can harm garmets worn with the mail. Dependig on the angle of the crossing you can grind the edges off or just throw the ring away. Even the ring shown in the siedview has a slightly crossing.
During making rings and maybe after some pulling tests you will gain an imagination, how a ring should be like. However crafting rings manually yields varying quality. Remebering, that mail garments were once used as a protection from injury and death, a person wearing the mail would like nothing less than rings of highest quality. This doesn’t mean rings of lower quality have to be thrown away without exeption. They can be used in mail sheets of lower quality to protect less endangered bodyparts. It is concievable that budged-priced mail garments with medium quality existed.


