
Making A Cutting Tool For Rings In Mail Armor
How to make a cutting tool for chainmail rings.
The next step after coiling is to cut rings out of the coil. There are different ways to do this. It depends on whether you want to make rings for riveting or butted rings. For riveted rings, you need the ends of the rings to be overlapping, whereas the ends of the butted rings just slightly touch each other. It means the butted rings are neither open nor closed after cutting but in a state between. The ends of butted rings should match exactly. Otherwise, the connections of the weave could reopen. The shape of the ends should also be smooth and without a protruding burr, that could damage garments worn with the weave. This is less important for riveted rings due to the overlap being flattened by hammer strokes. The cutting can be done by a chisel, a saw or pliers. I use a pair of nipper pliers. It works fastest and easiest for me. I think a saw is no good choice. It can create rings with ends, that don’t match and have burrs.

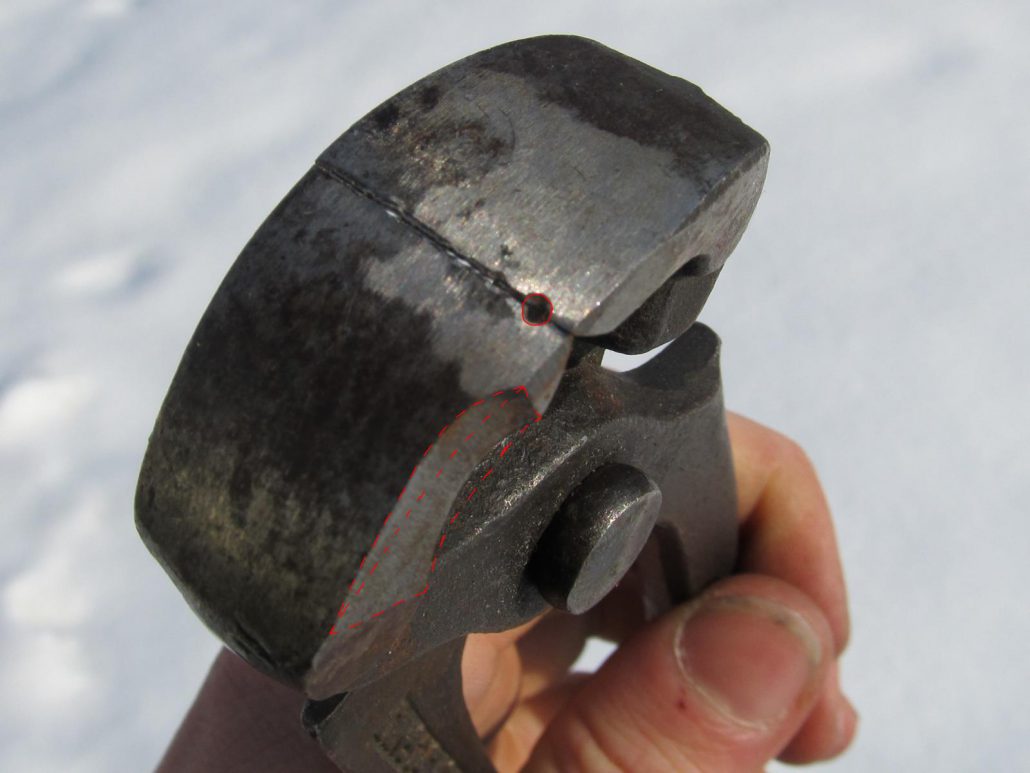
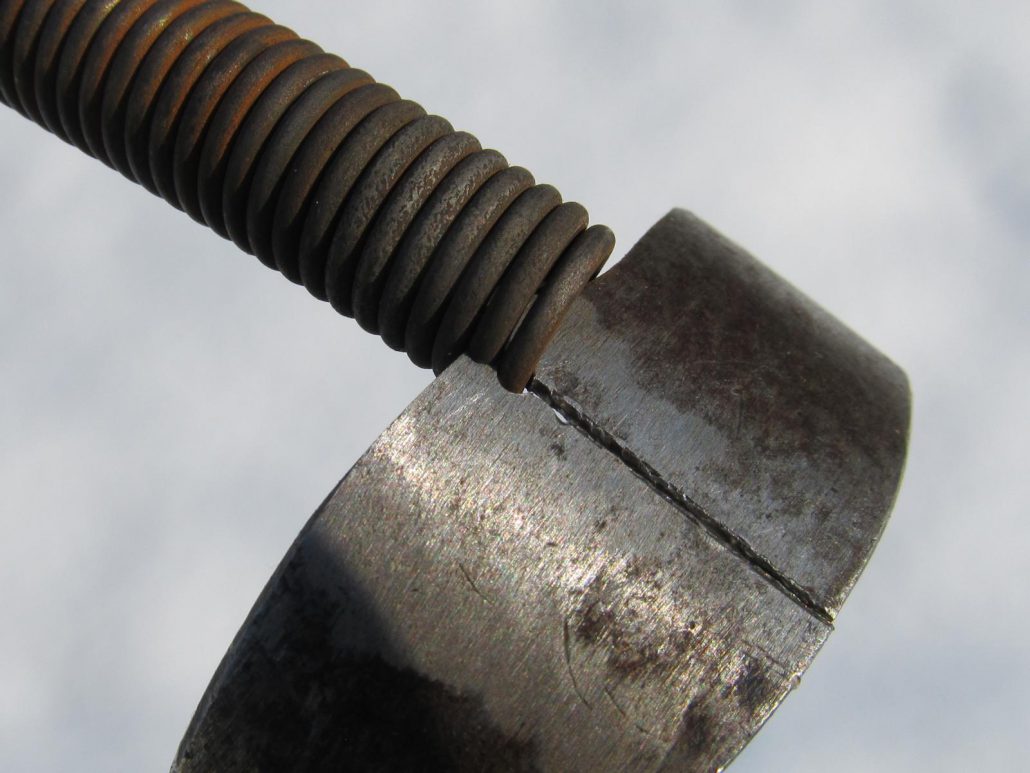
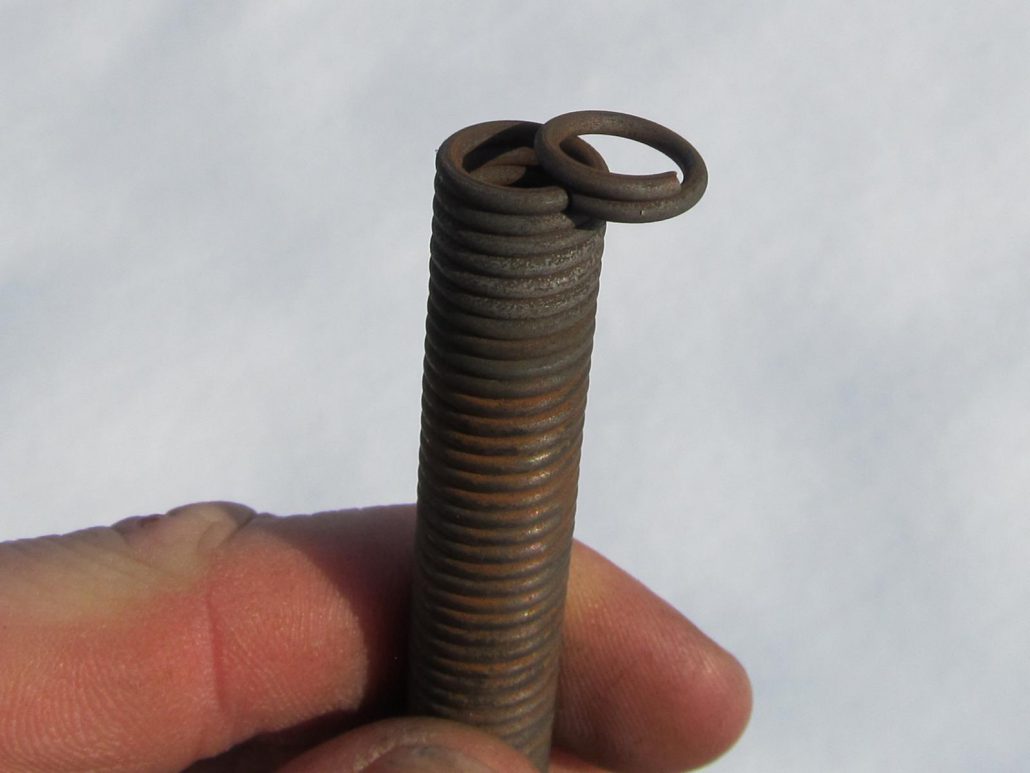
My cutting tool is an ordinary pair of pincers, which I modified for this purpose. I extended the handle with two pieces of aluminum pipe for better leverage. I also sanded a cavity into the side of the pliers head. It is a little bit deeper as the diameter of the wire. I did this with an electrical rotating sanding wheel, which was made for sharpening knives. Furthermore, I drilled and filed a recess respectively a hole into the blade, that is settled in distance of one wire diameter to the border. Due to the pliers being hardened it there was much scuff at the drill and the file. A better way would be to forge such a pair of pliers and to bring it into the desired shape before hardening. Anyway, the way I did it, would probably be more practical to the hobby mail maker. The function of the hole is that the outer loop of the coil is spared yet the second loop gets cut. This creates the overlapping. My pair of pliers is a little bit blunt and old. Sometimes a ring gets not completely cut as shown in one of the pictures. In this case, I grab it and bend it until it falls apart.
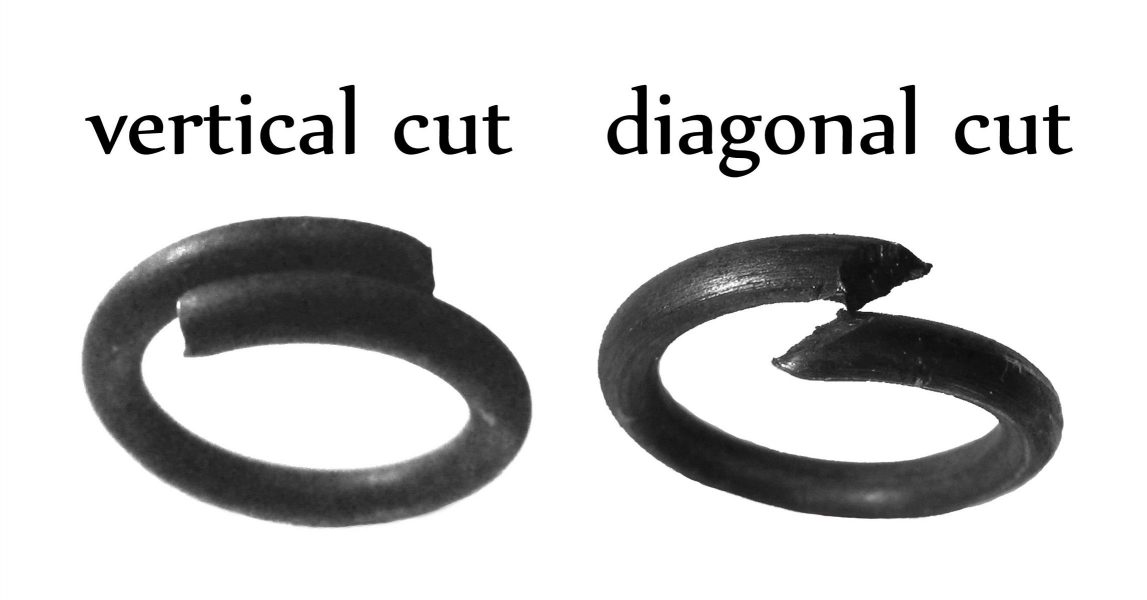
Working with this tool makes a cut, that goes vertically through the wire and in a parallel direction to the coil. It is also possible to make a cut, that is parallel to the coil, yet goes diagonal through the wire which creates an overlapping, too. I make such cuts with the unmodified side of my pliers. It’s a little bit tricky because it does deform the ring, especially for pointed angles. The deformation makes it later difficult to hammer the overlapping with both ends laying on top of each other. This deformation is caused by the flat shape of the pliers’ edge, whereas the wire in the coil has a curved shape. In my
If you cut the rings vertically to the wire and have a good pair of pliers and some experience, there is no reason to worry about deformed rings. Though in my opinion, the diagonal cut rings have a better shape. Their overlapping looks nicely oval rounded after flattening, whereas the overlapping of vertical cut rings looks rather rectangular with protruding edges. I think, that these edges can damage

Instead of working with the pliers in the hand, it might be quite comfortable to fix the tool to a table. The next picture shows the ingenious ring cutting machine made by


