
Making a Chainmail Shirt – A Chainmail Tailoring Tutorial
Here you discover two ways of making a short-sleeved chainmail shirt. You will understand why it is worth to learn advanced chainmail tailoring techniques for making a better fitting mail-shirt.
Making a Simple Chainmail Shirt
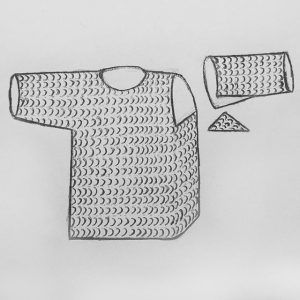
Many tutorials for a chainmail shirt show a simple construction. Yet a simple mail-shirt – as shown in the picture below – builds tension around the armpits and shoulder plates. The rings can break at these points, especially if you are using butted rings. In the next chapter, you will learn how to make a better chainmail shirt.
An oversimplified way of making a chainmail shirt. This builds tension in the armpits.
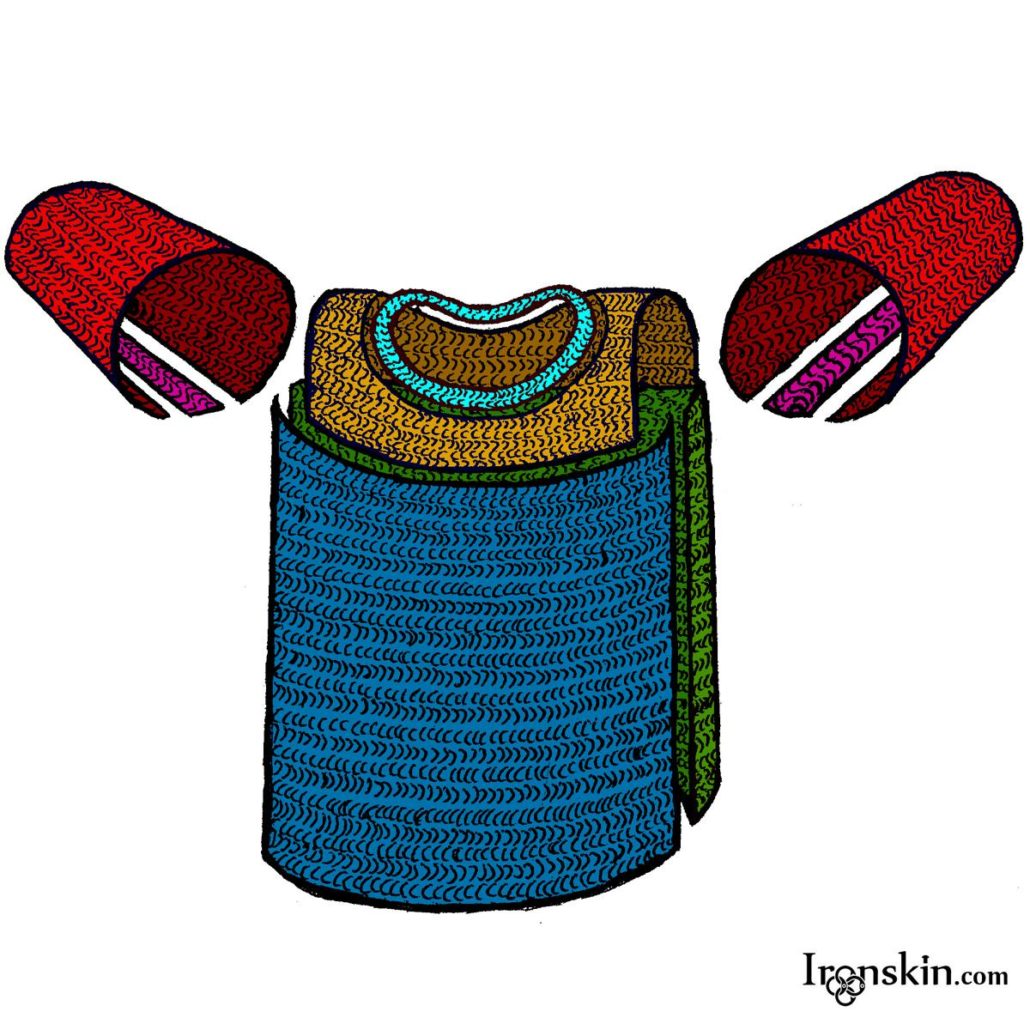
Making a Tailored Mail Shirt
To make a more sophisticated, well-tailored chainmail shirt, you take into account that arms are naturally pointing forward. Also, you give the arms a conical shape. Furthermore, you avoid connecting three pieces in one spot and make seams less visible.

This is a sophisticated construction for a chainmail shirt. It avoids tension.
Advantages of a tailored Chainmail Shirt
The sophisticated version takes about the same amount of time to make and is definitely worth using it. Here is what you can do differently and what benefits you get by doing so:
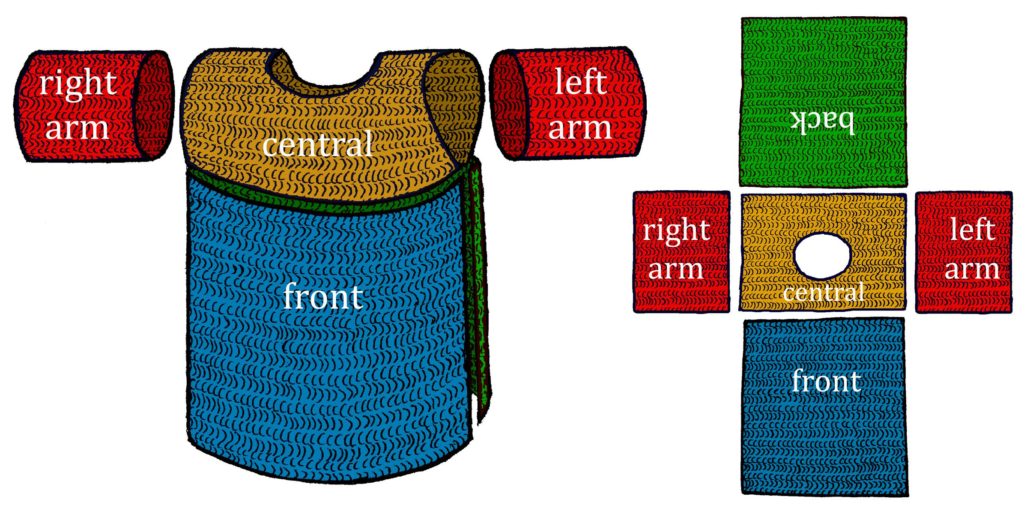
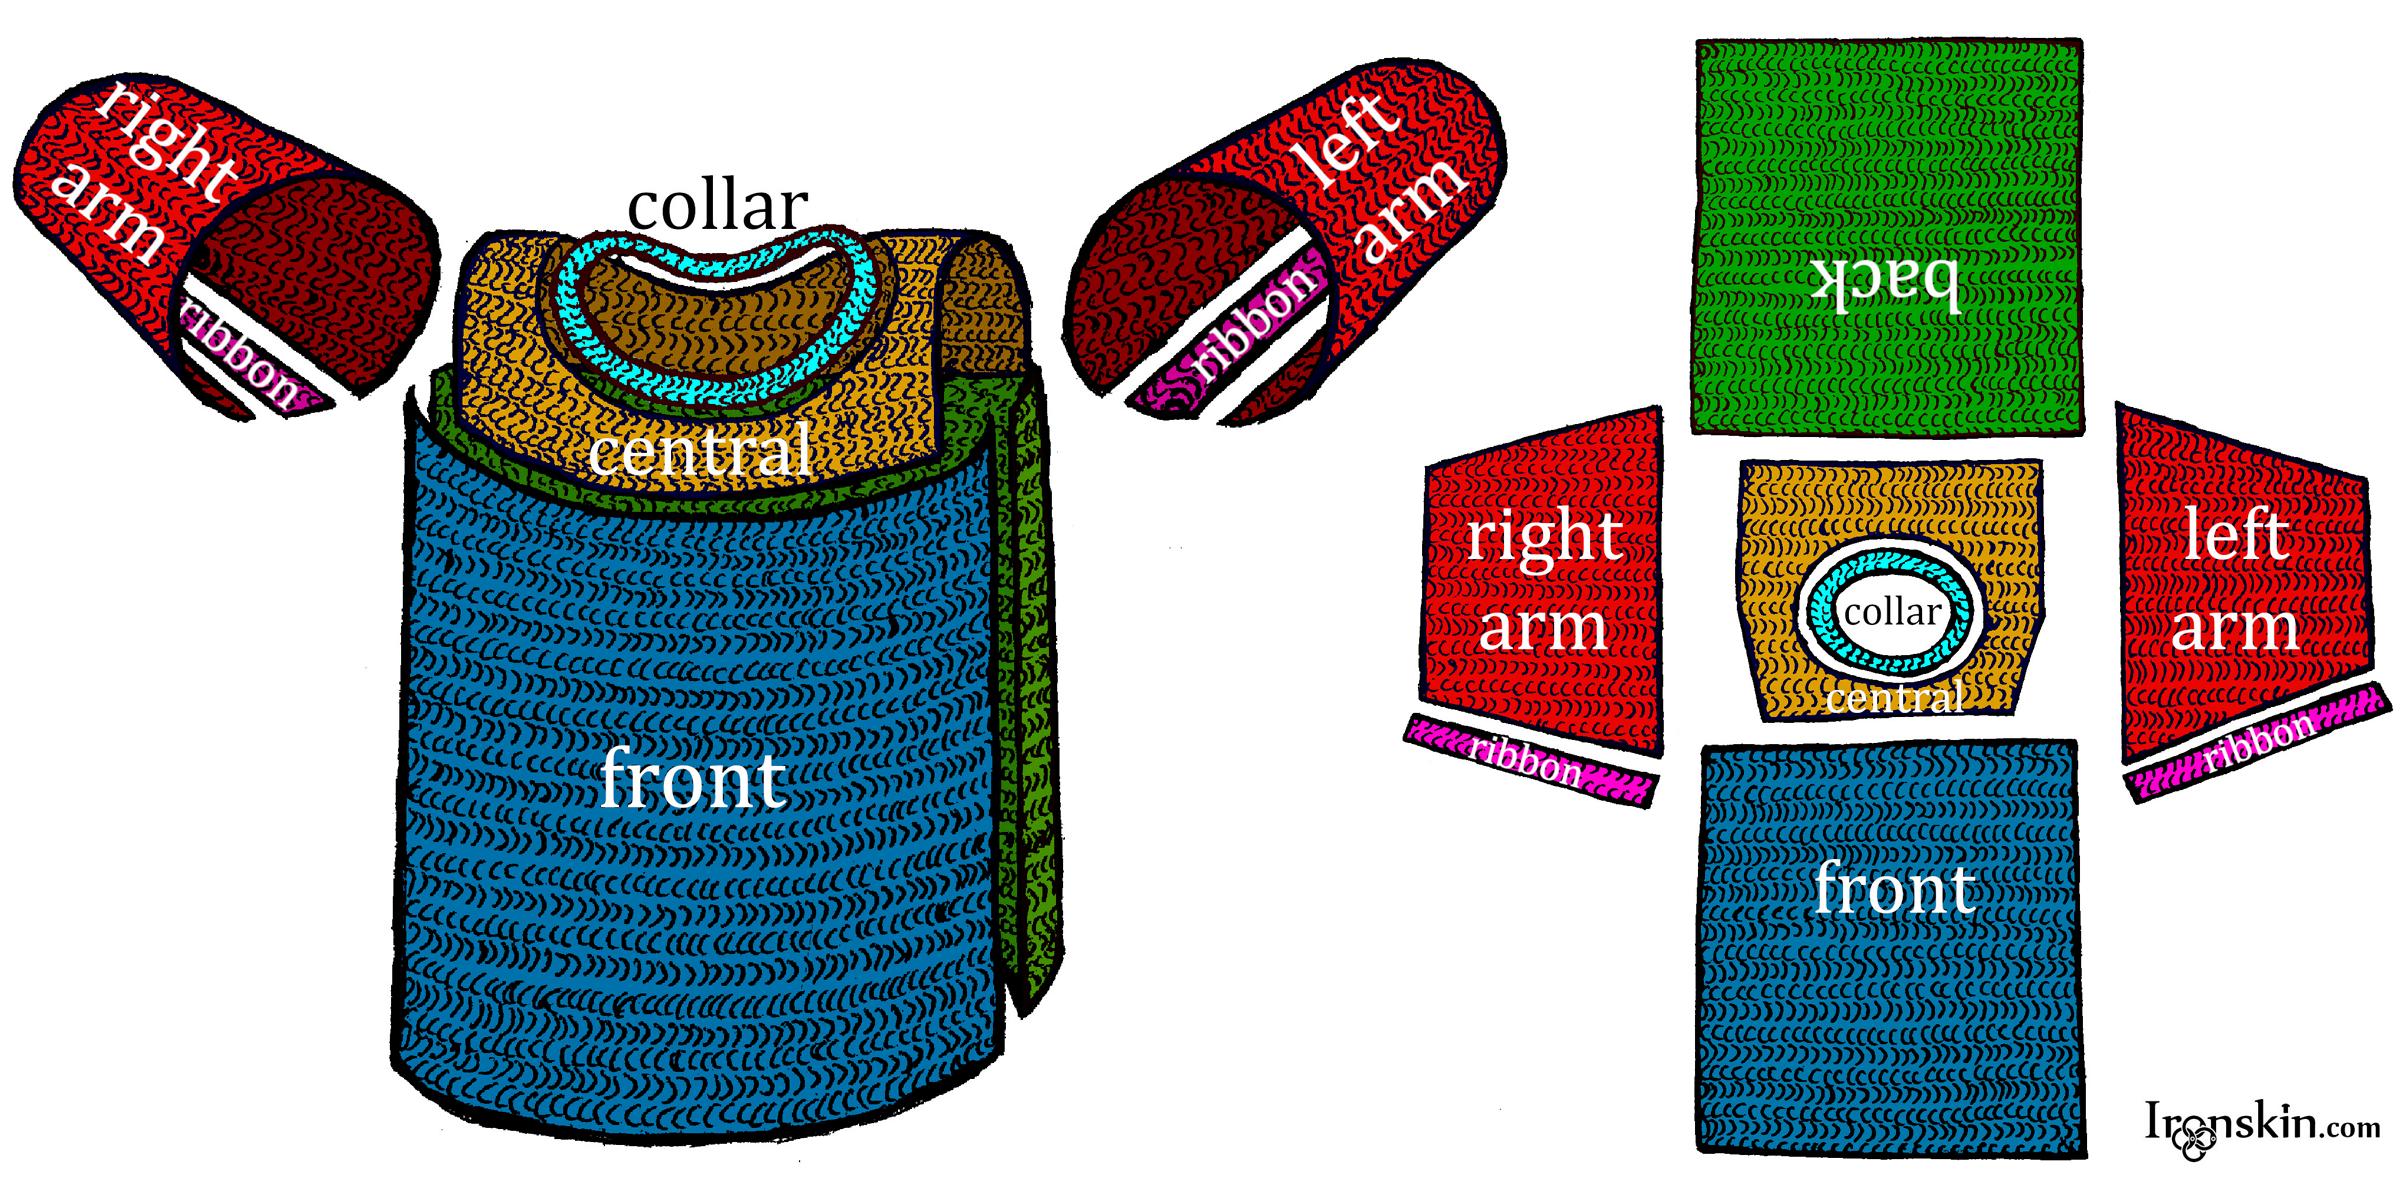
- collar: You add a ribbon of chainmail around the head hole. This collar ribbon can stretch more than the edge of the central piece. It allows you to extend it to an upstanding collar or to attach a coif.
- central: head hole moved to front: You move the head hole towards the front to add more space for the shoulders.
- central: shorter than front and back: You make the central piece shorter to prevent tension under the armpit. Thus you can also connect edges of the front and the back to the arms. This is better than connecting four pieces at one point.
- central: tapered towards the front: Here you take into account that the arms can naturally bend more forward than backward. You cut off the front edges of the central piece. As a consequence, the arms are pointing forward when they are connected. This gives you relatively speaking more space for the shoulder muscles when you flex your arms.
- arms: conical shape: You represent the shape of the upper arms with conically tapering sleeves. For a short sleeve, it is not very important. For a long sleeve, it can save a lot of weight. Furthermore, it stops the mail from dangling and thus allows to move the arms faster.
- arms: ribbons: For the conical shape of the sleeve you need a seam along the arm. By inserting a strip or ribbon you make two seams instead of one. This allows you to taper the sleeve in a smooth looking regular way. It looks less visible that directly connecting closing the tapered arm piece with one seam.
Step by Step Guide for Making a tailored Mail Shirt

Time needed: 60 days
This is how you build a chainmail shirt step by step. You can either grow the parts ring by ring or buy a chainmail shirt and cut parts out of it.
- Build the front and back
Create two areas of chainmail for the front and back. The combined horizontal width should be enough to reach around your chest. If you want you can give the torso an hourglass-shape by using expansions and contractions.
- Build the central part
Start by making a roughly square piece with an octagonal hole in it. The hole should be wide enough for your head to fit through. Also, the hole should not be in the middle of the piece, but be closer to the front. The central part should reach from shoulder tip to shoulder tip.
- Build the collar
Make a long ribbon of about four rows width. Connect the ribbon with the inside edge of the central piece. For connecting with the top and bottom edge you connect naturally to the same orientation of the chainmail pattern. For the sides, you use cross-grain connection and merging-rows seam.
- Build the arm parts.
Make a trapezoid shape in the dimensions of your upper arm. It should taper evenly from top to bottom. Next, build a ribbon with the same length. Make it about four rows wide. Connect the ribbon with the arm part by merging rows technique. Without the ribbon, the arm part should fit very tightly. With the ribbon, it should fit loosely enough to allow flexing all arm muscles.
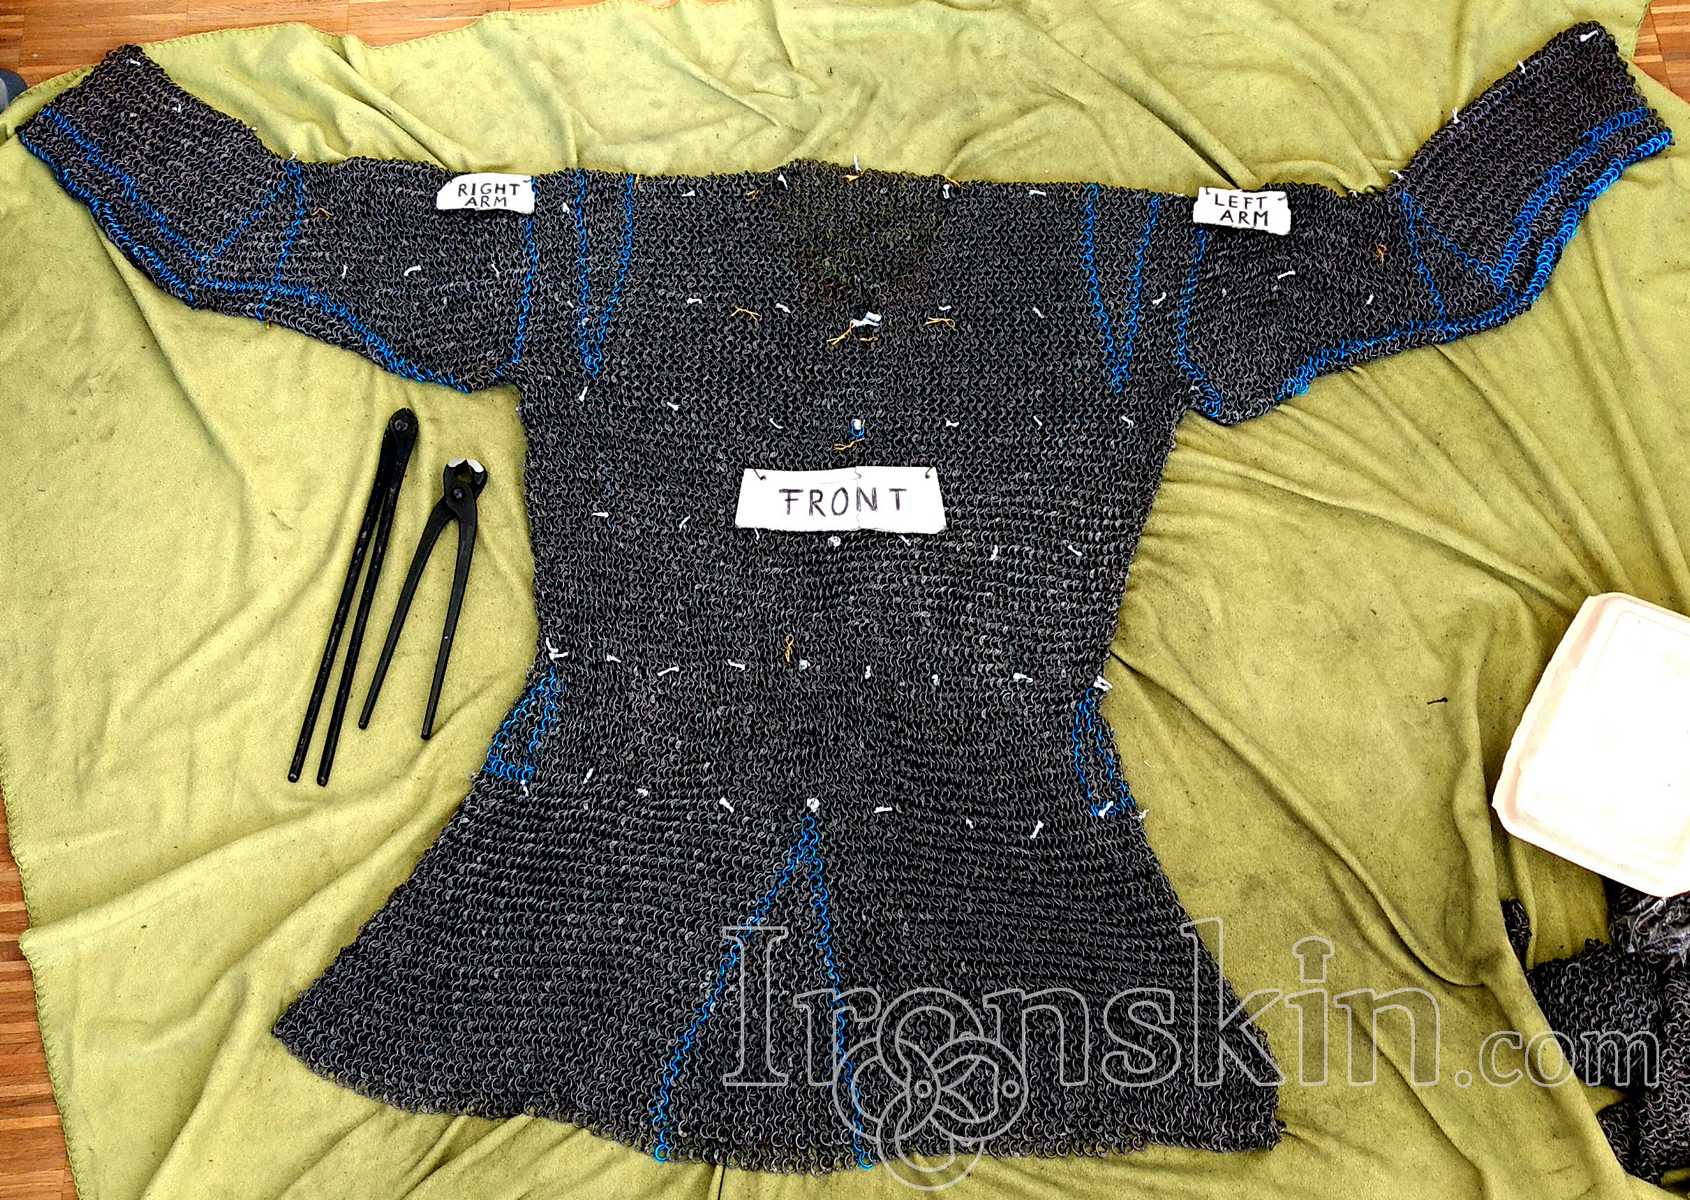
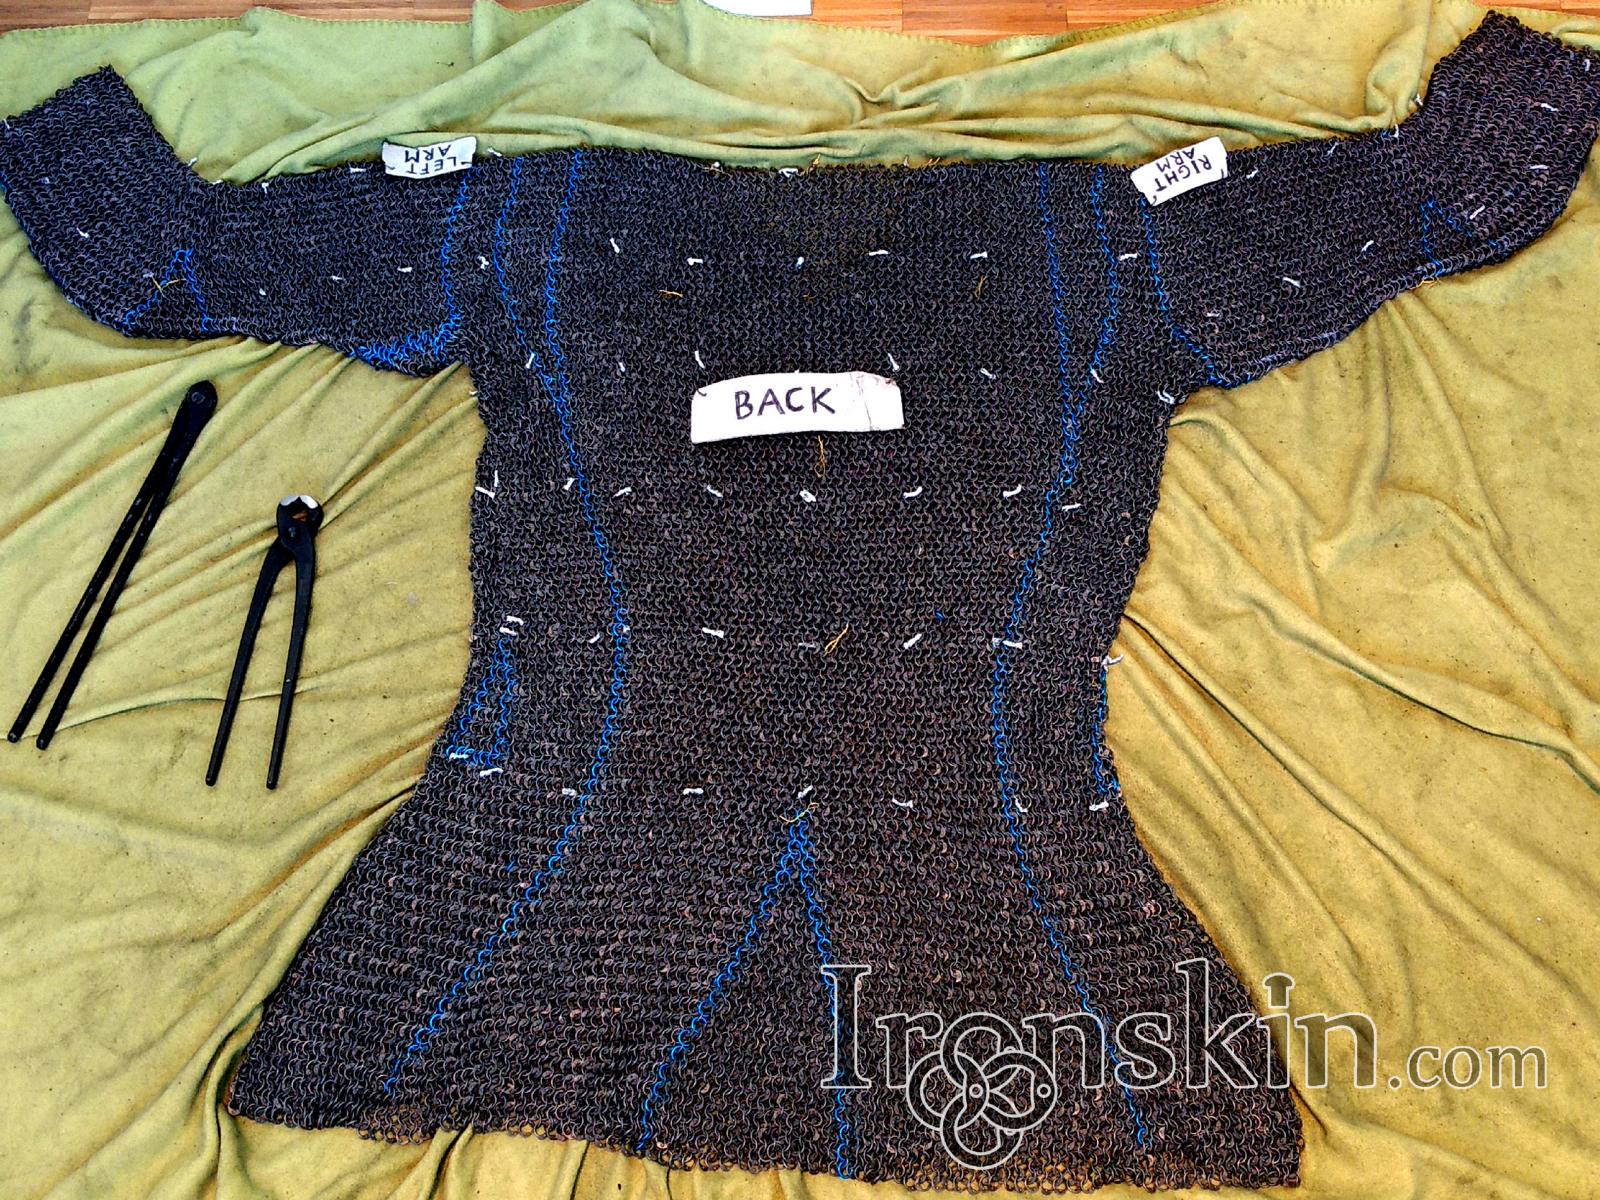
- Mark the middle of all edges.
If you haven’t done it already, find the middle of all edges on all parts by counting rings. Mark the central rings with colored wire or thread. This will help you to keep order when you connect the parts.
- Connect the parts
Start by connecting front, central and back part with their middles aligned. Add the arms with the ribbon facing down. Check whether the number of rings on the edges of the sleeve and torso match. If it does not match you can do adjustments by adding or removing columns from the central part. There is also a short section of the front and back that you connect with the sleeve. Likewise, you can add or remove rows here. You do this connection with a cross-grain seam. If the edges still don’t match exactly, you deviate from the 4in1 pattern near the seam with expansions or contractions.
Further Reading
There are a few other chainmail shirt instructions that are worth mentioning: the Instruction by Simon Livingston and this Guide on Instructables.
If you want to make a long-sleeved chainmail shirt, have a look at the sleeves-article. For making a full hauberk you might also be interested in the chainmail coif-tutorial and the gloves & mittens guide.
Join the ranks of Ironskin supporters:


